- From the Home page, click New Requisition.

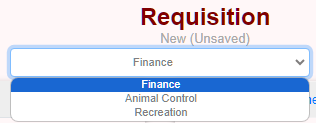
- Select a work flow for the requisition by using the drop-down menu. The drop-down menu is only available if the user is apart of multiple workflows.
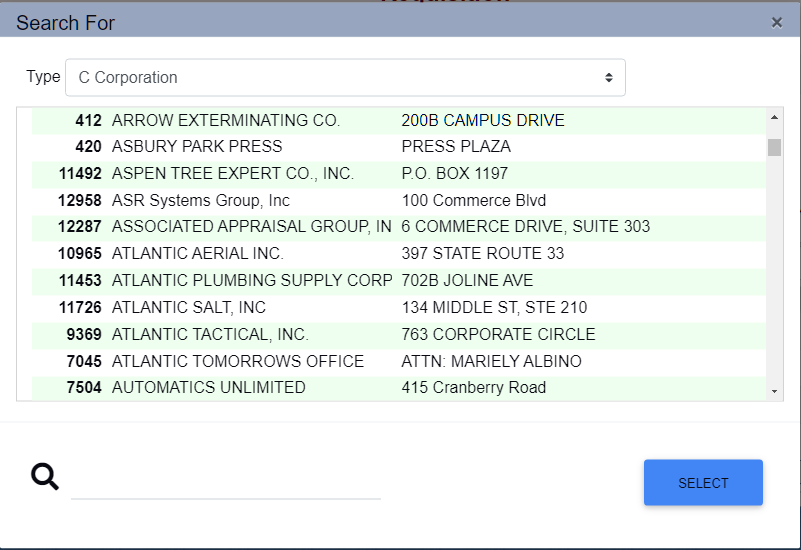
- Select a vendor by clicking the magnifying glass.
- The full vendor list will populate.
- Choose the vendor type (optional)
- Enter the vendors name or number and the list will automatically filter.
- Double click the vendor you need.
- If the vendor you need is not on the list, enter the new vendor information (name, address, TIN) in “Notes:“. Call Municipal-Software if you are unsure.
- Start entering the account number on the line item table; a list of available accounts will appear.
- Enter the commodity code (optional), the quantity, unit, description, and amount.
- When finished, click Save/Submit or Save as Draft at the top of the page.
Requisition Page Details
- The Ship To tab opens the shipping address drop-down list.
- The Information section allows you to input the Project #, Contract #, and select options for the requisition. Once the requisition has been saved you can attach quotes and add other documents.
- Enter the Requisition Description in the box above the account information.
- If a vendor is not on the list, enter the new vendor information in the “Notes:” area. A W-9 and BRC are required. Call Municipal-Software if you are unsure.

Was this helpful?
0 / 0